

How To Install Veneer Edge Banding
Give your Carpentry an Edge
By Rob Robillard
Wouldn't it be nice if nosotros could apply thin layers of pare to cover our aged, wrinkled and crude edges? For a pretty penny I'thousand sure some plastic surgery could achieve this, but nothing covers rough edges every bit nice as applied veneer banding.
I recently was asked to build Ac-grade plywood cabinets for a client. To finish the cabinets I covered the outer sides with rustic, rough sawn boards and matching overlay doors. The insides of the chiffonier show the A side of the AC plywood. The merely surface that was not addressed was the rough plywood edges.
This commodity shows how I covered the plywood edges with veneer edge-banding tape.
What is Veneer Record?
In cabinet making and woodworking, veneer refers to thin slices of forest, commonly thinner than ane/eight in., that typically are glued onto the edges of cadre panels, doors, shelves, tops and panels for cabinets and furniture.
Veneer is obtained either past "peeling" the trunk of a tree or by slicing large rectangular blocks of wood known equally flitches. The advent of the grain and effigy in wood comes from slicing through the growth rings of a tree and depends on the angle at which the woods is sliced.
There are three main types of veneer-making equipment used commercially:
Rotary lathes turn the wood using a sharp blade and skin off continuous veneer rolls. Rotary-cut veneer is mainly used for plywood.
Slicing machines operate in a fashion that raises and lowers the flitch or piece of log confronting a blade. The resulting slices of veneer look like sawn pieces of wood, cut beyond the growth rings. This is frequently referred to as "crown cut"..
Half-circular lathes manipulate the logs in order to obtain the most desirable parts of the grain for the all-time looking veneer.
Veneering is an ancient art, dating back to the aboriginal Egyptians 4000 years ago who used veneers on their article of furniture and sarcophagi (the ornate coffins they were cached in). In Arab republic of egypt, forest was
a scarce raw cloth, and the veneering process immune the precious wood to exist used more than economically by maximizing the available supply.
Today'due south Veneer
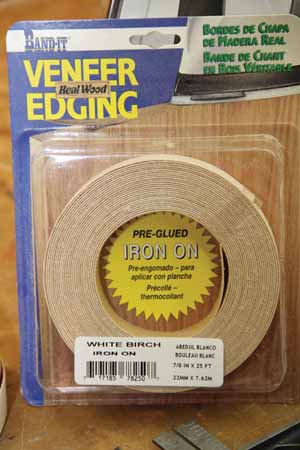
Veneer tape today can be purchased at a lumber thou and comes as a pre-sanded, ultra thin layer of wood or other material. This veneer record can then be attached to the edge of plywood in order to make the plywood look like a solid piece of forest.
The veneer border-banding tape we use has a heat-sensitive mucilage backing and applies quickly with an iron. Using veneer border banding results in a make clean and solid-wood look and is a fairly easy DIY project.
Real wood edge banding comes in several sizes and species of wood. The vii/8-in. edge banding is ideal for three/4-in. thick plywood or veneered panels because it allows a bit of overhang, making it like shooting fish in a barrel to trim flush with an border-trimming tool. The tape is impregnated with hot-cook adhesive that creates a loftier-speed permanent bail once heated. The veneer is likewise pre-sanded and readily accepts stains and finishes.
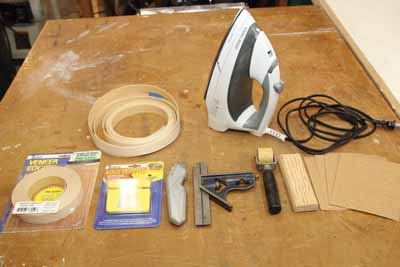
Veneer edge tape is typically applied with an fe. I prefer to use furniture-grade birch tape that's slightly oversized, like 25/32 or 13/16 inch. By installing a slightly oversized tape y'all tin can trim the edge banding to an exact fit.
Application of Veneer Edge Banding
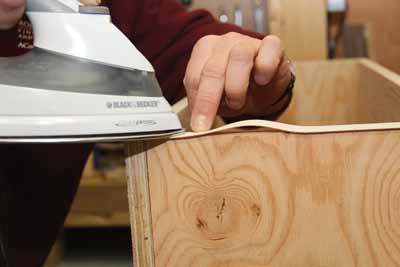
1. To employ the veneer border-banding tape, heat your iron to just shy of the hottest setting. Utilize care with placement of the atomic number 26 while not using it.
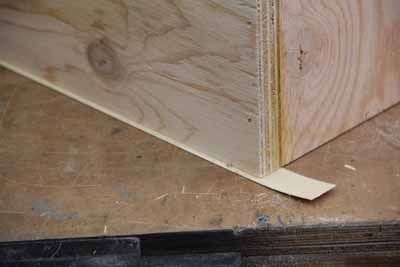
2. Cut a section of tape 1-in. longer than needed.
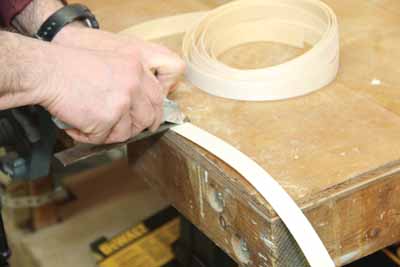
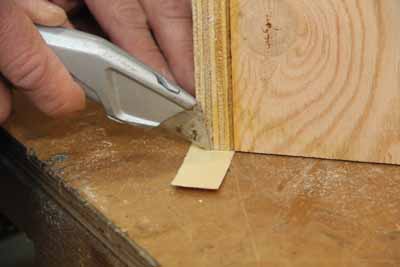
3. Using a square and a utility knife, foursquare off your starting border.
4. Position the squared edge on the border of your plywood or other substrate and smooth it with a few passes of an iron.
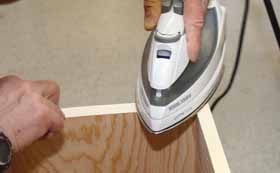
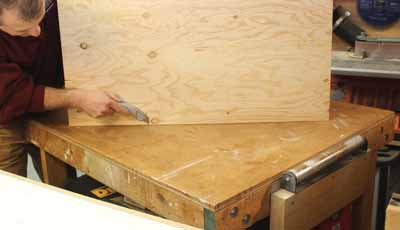
5. Oestrus merely 6 inches at a fourth dimension with the iron.
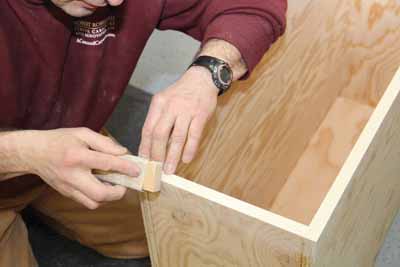
half-dozen. Use a roller or shine cake of wood to firmly printing downward the heated section of veneer record. Curl it back and forth, working the glue into the plywood.
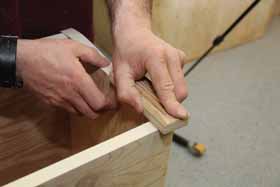
7. Repeat this procedure until y'all become within a few inches of the end of tape.
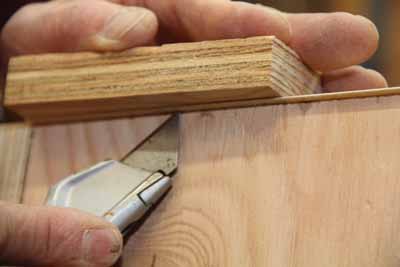
8. Utilise a foursquare and utility pocketknife to cutting the stop of the record to fit
9. Iron and press the tape firmly.
x. Trim the excess width and length with a utility knife.

Tip: Apply your over-sized width tape flush to 1 side. This will eliminate the need to trim both sides of the border afterward the record is installed. If possible place the textile upside-down on a workbench and trim the record against a table. If admission is hard, as for a big bookcase, employ a block of wood every bit a backer for your utility pocketknife.
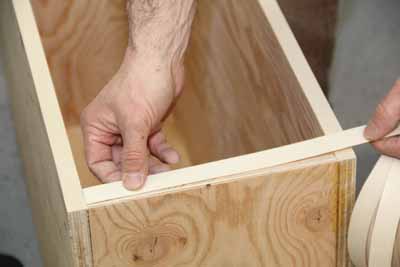
Applying Intersecting Veneer Tape
With born cabinetry and furniture you lot often take vertical and horizontal areas that need edge record. I ever install the long pieces first (unremarkably vertical) then work on the perpendicular edges. The procedure is similar to standard awarding, merely with a few additional steps:
1. Cut a longer than needed strip.
2. Square up your starting finish and butt information technology tightly to the pre-installed veneer edge record.
3. Heat and press the record into the joint. This ensures the edging will not skid away and create an cruddy open seam between the two pieces.
4. Heat and curlicue your record until y'all get approximately 3 to four inches from the terminate.
5. Do not heat these terminal few inches yet.
6. Foursquare and cut your end approximately 1/64 longer than the seam.

7. Bow upward your tape and tuck your seam tight to the border of the already installed veneer tape. Push the record downwards. The additional length ensures a very tight plumbing equipment seam.
8. Iron and printing the record down to complete the glue installation.
nine. Trim the record to fit.

For both applications, finish upwards past sanding the edges of the tape with 150-grit abrasive. Slightly deceit your sanding block to polish the corners and requite the panel the convincing wait of solid, natural woods.
Editor's Note: Robert Robillard is a remodeling contractor based in Hold, MA, and editor of a www.AConcordCarpenter.com.
Side Annotation 1
Grades of Plywood
Plywood is graded on quality and the appearance of the outer layers of veneer. An A class indicates the plywood has the best appearance, all of its holes are patched, and it has a sanded cease. "C" grade plywood is un-sanded and may have both knots and defects visible on the board confront. AC plywood has one A side and one C side.
Side Note 2
Types of Veneer Treatments
Veneer tape is ane of several ways to cover exposed edges of plywood. These photos show how we cut 1/4-in. rigid strips of oak, mitered at the corners, to muffle the plywood border of a shelf. There are several approaches to edge treatment, all with different results and applications.
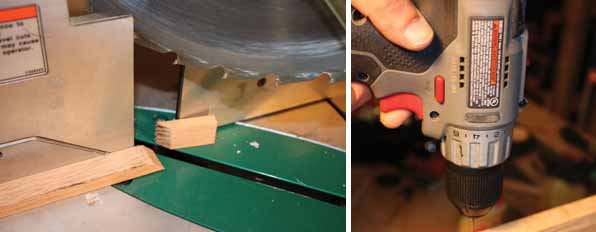
• Solid edge banding, like the thin strips shown.
• Solid edge banding made of thicker wood strips that can be routed for a decorative profile.
• Oversized edge-banding or nosing that creates an overhang.
• Solid joinery.
Side Note iii
 Types of Veneer Treatments
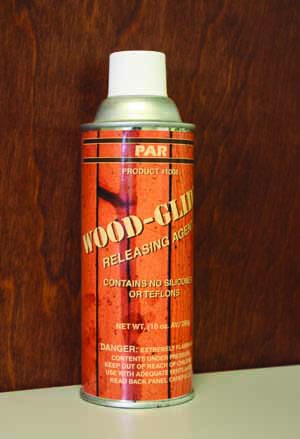
Wood-Glide can be used on all moving parts that would unremarkably require a lubricant, eliminating the need for several different products in the work area. This all-purpose lubricant tin can save a tremendous amount of money by replacing most other lubricants that contain chemicals such as Teflon or silicone, which are extremely harmful to the finishing of wood. Wood-Glide can be used on all wood, metal and plastic applications without any adverse side effects. As a glue-releasing agent, the production volition prevent adhesion of excess mucilage, while not interfering with the gum-to-glue bonding. Par Enterprises offers a 100-pct money back guarantee to anyone who is not satisfied with the product. Visit woodglide.com.

Source: https://extremehowto.com/applying-wood-veneer-edge-tape/
Posted by: jacksonoverects58.blogspot.com
0 Response to "How To Install Veneer Edge Banding"
Post a Comment